SolidWorks Tutorial 30: How to Use SolidWorks Shell Tool Feature
Welcome to Solidworks tutorial for beginners and in this tutorial post, you are going to see how to use the Solidworks shell tool feature in this CAD software in step by step manner. Also, it explains the Shell features and its uses in Solidworks CAD modeling.
What is SolidWorks Shell Tool?
SolidWorks shell tool is mainly used for shelling process, in which the material removed from the inner body of model by keeping small thickness and results a hollow model. Using this tool, you can make either completely closed hollowed model or one face opened type. It is also a placed feature tool which can apply directly on the existing model or features. Checkout Best SolidWorks Training Materials here.
The Solidworks shell tool is located in both features commandmanager and Insert menubar. In Solidworks, Shell feature having their own property manager which controls the application of shelling process on designed models. Here, both uniform thickness and multi-thickness shelling can be easily done by using this feature tool. Multi-thickness shelling helps you to apply different thickness on the faces as per your design need. Also you can decide whether shell outward or shell inward. Shell outward means the thickness addition is from the outside edge and direction away from that surface.Shell inward is just the opposite of the shell outward one.
Related Placed Features:-
- How to Use SolidWorks Fillet Tool
- How to Use SolidWorks Chamfer Tool
- How to Use SolidWorks Hole Tool
- How to Use SolidWorks Hole Wizard Tool
- How to Use SolidWorks Rib Tool
Note: Placed features means you don’t need to create sketch or model to apply this feature tool and you can apply it on the exiting model. Placed features tool helps to improve your design productivity, efficiency and make job easier within smallest steps.
Let us see how to use solidworks shell tool for making hollow models.
How to Use Solidworks Shell Tool
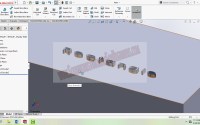
Here I am going to make rectangular shell in which shows how to use this tool, shell property manager, application of uniform thickness & multi-thickness options and shell inward & outward.
Step 1: Create New Part File
Open Solidworks CAD software and create new part file. Then select any one of the default from the Featuremanager designtree like Top, Front or right plane. Here I selected the “Right Plane” and make “NormalTo” using view orientation tool from The Solidworks Headsup toolbar.
Step 2: Create Rectangle Box
Go to the Solidworks sketch user interface, select any type of rectangle sketch tool from the sketch commandmanager and draw on it.

You also dimension it using Smart Dimension tool and here I am give 100 x 50 mm (roughly).
Click on “Exit the Sketch” and go to Features commandmanager. Then select “Sketch” from the Designtree manager and click on the “Extrude boss/base” feature tool to create new 3D rectangle box by extruding it about “100 mm”.

Step 3: Select SolidWorks Shell Tool
From Features Tools

Go to features command manager and click on the “Shell” button to select it.
Or
From Insert menubar

Go to menubar, click on the “Insert”. From drop down menu, select “Features” and side drop down menu will appear and click on the “Shell”.
Insert -> Features -> Shell
Step 4: Apply Solidworks Shell Tool
Then you can see the Shell property manager on your Solidworks Graphics UI and from that you have set as per your design values like shell thickness and select face to remove.

In this, I set the “5 mm” using the thickness spinner and select the top face “face1” to remove. This is “shell inward” application. You can see the shelling preview below.

Then click to the green tick button to apply the solidworks shell feature to your rectangular box. You can see the final image below.

Apply Shell Outward

Tick the “Shell outward” option in the propertymanager, the shelling direction will change to outwards. And click on the green button.

What will happen if you don’t select Face to Remove?
The Solidwork shell tool still create closed hollow rectangular box with given thickness.


How to Use Solidworks Multi-Thickness Shell
In the same part file, I will show you how to use multi thickness shell feature setting.
Go to FeatureDesignTree manager and right click on the “Shell2” and select “edit feature” which is shown in figure.
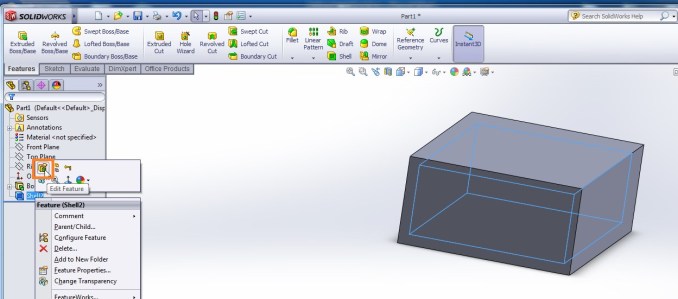
Then it shows the Shell property manager and from that click on the “Multi-thickness setting” .

Select faces as you need to change the thickness. For example, select “face 2” and set the special thickness value in Multi-thickness spinner as “10 mm”. Like that you can select other faces also and for each one you have to set separate thickness, if you want to do so.

Then click on green tick button to finalize it.

To get more How To Tutorials, Follow me on Facebook, Twitter, GooglePlus and YouTube.

SolidWorks Tutorial 18: Swept Boss or Base Feature

SolidWorks Tutorials 3: Circle Sketching Tool