SolidWorks Tutorials 3: Circle Sketching Tool
The Solidworks circle is another important sketching tools which enable to create the circular drawing on the graphics area. You can access the circle tools from the Sketch tab of command manager. There are two circle tools are available and they are “Center circle” and “Perimeter circle”. In this SolidWorks Tutorial-4, you are going to see how to draw center and perimeter circle in the sketch area with detailed explanation of circle property manager menu.
Note: This is just tutorial showing how to use circle tool, not showing any product drawing or designing in it. If you are advanced SolidWorks user please avoid it. This Solidworks tutorial is for beginners, students or people likes to learn about SolidWorks.
Checkout Best SolidWorks Training Materials here.
Table of Contents
How to Use Circle Sketching Tools
Here the SolidWorks tutorial is divided into two parts for showing how to draw center circle and perimeter circle.
How to Draw Center Circle
The center circle contains two points such as its center and radius.
Step 1
Open a New part file. If you don’t, click here to see How to Open New Part File before start drawing
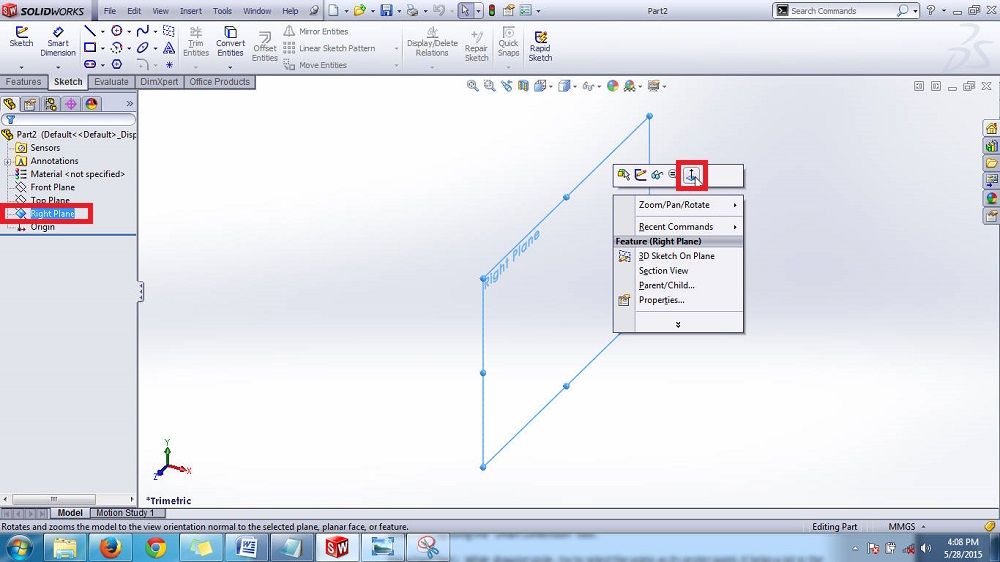
Step 2
Here select (for example), “Right Plane” and click the mouse right button on the plane. From the menu select “Normal To” as shown in red marking. click here to see View Heads-up Toolbar
Step 3
Select the “center circle” button from the sketch toolbar shows below.

Step 4
Drag you mouse pointer to graphics area and click on it to select the center and drag to a certain distance to set the radius. You don’t bother about the dimension of your circle. You can set the actual dimension by using the “Smart Dimension” tool.

Important Tips! : While drawing circle, try to select the origin as its center point. It helps a lot in the advanced 3D modeling.
This way you can draw center circle the graphics area of SolidWorks.
How to Draw Perimeter Circle
The perimeter circle has three points needed for completing the circle. The three points are on the circle surface (perimeter).
Step 1
See the Step-1 in the Center Circle tutorial shown above.
Step 2
Select a plane (e.g. Front plane).

Step 3
Select the “perimeter circle” button from the sketch toolbar and the button is represented below.

Step 4
Move the mouse pointer to graphics area and select the three points on it to complete the perimeter circle drawing.

There is an alternative way to access the Circle tools.
By using Tools Menu
Go to Solidworks Menubar, Select the “Tools”. From the dropdown menu, select the “Sketch Entities”. Then it will show side drag menu. Select the “Center/Perimeter circle” which I shown below.

Watch Different Circle Sketching video:-
Additional Info: Circle Property Menu
For both Center and perimeter circles, the property menu is same, which is explained below with image.

Existing Relations: If your work area contains one or more center circles, you can see the relations between them by selecting each of them.
Add Relations: If you fully set the dimension of your circle, you can “Fix” or lock the dimensions as you set.
Options: For construction option is available, which helps to easy snapping or addition of drawing on the circle.
Parameters: Here you can set the exact center co-ordinate as you needed in your work area. If you need to place the circle center in origin, just type x=0, y=0 (first two section)and also change the radius by using the third section.
Thanks for reading this SolidWorks Tutorials and share your honest opinions as comments here. Read more about me and Contact.
Reference: What is circle?

SolidWorks Engrave Text | SolidWorks Tutorials 41

SolidWorks Exercises-1: Circle Sketch and Extrude Boss Feature
