SolidWorks Engrave Text | SolidWorks Tutorials 41
Hai friends, welcome to SolidWorks Tutorial for beginners and in this how to tutorial, you are going to see how to engrave text on part 3D model. It is one of the finishing tool which helps to engrave name or size of the product designed. There is no direct options to make engraving function in SolidWorks. So, follow the step by step tutorial which helps to learn SolidWorks engrave text in ease.
What are the Tools required for Engrave Text in SolidWorks?
Engrave text is not a direct command in SolidWorks. As you see in Emboss Text tutorial, it is just reverse of the embossing names. It is a common manufacturing option which mainly used for most of the industries to make name plates, product names etc. It is combination of two to three Solidworks features and sketch commands. Here, you can see the engraving of text with pictorial explanation.
How to Use SolidWorks Engraving Text on Metal Face
Here, you are going to see make a simple rectangular model and different ways to engrave text on the face of that model.
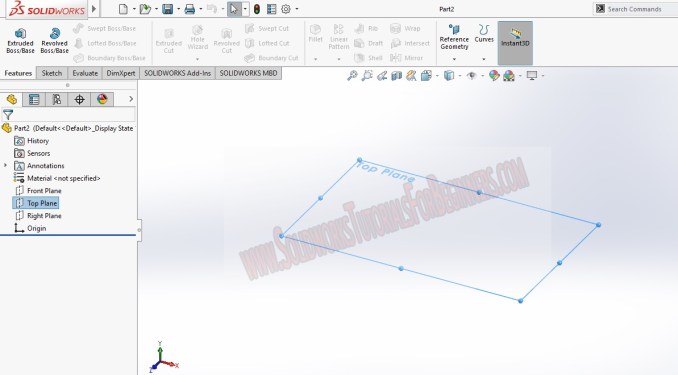
Step-1: Create New Part File
First you have to create new part file. Go to file menu and select New from the drop-down menu. Select Part from the dialogue box and click on OK. From the user interface, you have to select Top Plane which shown below.
Step-2: Create Rectangle using Sketch Tool
Go to the Sketch command manager and select the “Center Rectangle Sketch Tool”. Then draw the rectangle sketch on the top plane.
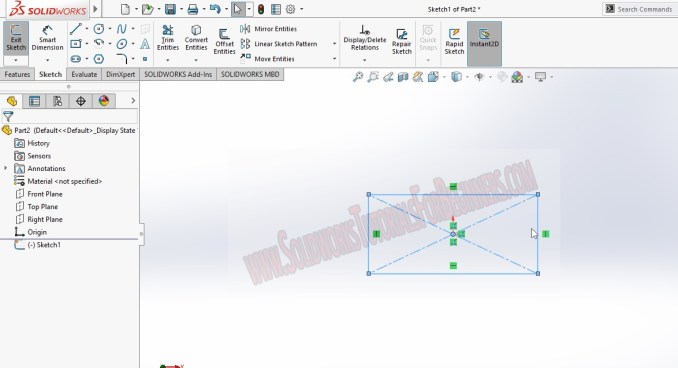
Click on the “Exit the sketch” button. Go to the features command manager and select “Extrude boss/base” feature tool. Apply the feature the rectangle sketch and make a 3D box as you seen below in the image.
Step-3: Make a Box using Extrude Boss

Step-4: Create Text on Face of the Box
First, you can see how to engrave text in linear manner on the box.
For that, you have to go to the sketch command manager. Select the face of the box where you need to engrave the name.

Select the “Sketch Text” tool from the sketch command manager and click on the selected face. Then enter the name you want to emboss on it. For example giving name as “Machine”.

To make engrave the name on the box, you have to go to the features command manager and select Extrude cut tool.

Adjust the extrude cut length of the text by using the “depth” on the extrude cut property manager. Then click Ok.
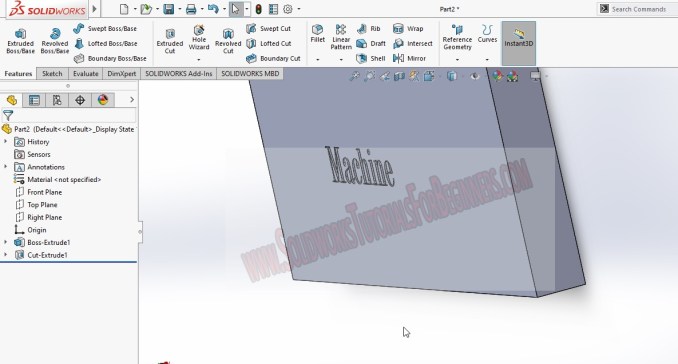
Create the text on the model surface and apply extrude cut feature to make it engraved. This way you can create text engraving on solidworks models. You can also give final touch by using Fillet feature and apply on the engraved text or name.
If you have any doubts about this Solidworks tutorial, feel free to ask via comment box or contact form.
Follow me on Facebook, Twitter, Youtube , Instagram, Telegram and Pinterest.

Standard Mate Concentric and Coincident Assembly | SolidWorks Assembly Tutorial-3

SolidWorks Fillet Features Tool Tutorials_SolidWorks Tutorial 25
