How to Insert Part File to Assembly | SolidWorks Assembly Tutorial-1
Welcome to SolidWorks Tutorials for beginners blog and in this SolidWorks assembly tutorial, you are going to learn how to insert component or parts to the assembly graphics area. It is the first and very important step for learning SolidWorks assembly. In this you will get familiarize with how to create a parts for assembly, extrude boss or base feature, and insert to assembly interface. Note that this SolidWorks tutorial is especially for beginner level students for better understanding.
Create Simple a part
Here, you have to create a very simple part or component. For example, you can create shaft using the circle sketch tool and apply extrude boss or base to make it solid 3D component.
Let us start to make the part.
Open the SolidWorks and select “New”.

From the appearing dialogue box, you have to select the “Part” and click “OK”. It direct to part graphics interface, where you can create solid machine components for assembly.

Select any default plane such as Top, front or right plane. Here, select “front plane” from the features manager design tree. And click on the “Normal To” for changing the view to 2D (x-y axis).

Go to the sketch command manager and click on the “Center Circle tool” for creating the shaft component.

Draw the center circle and enter diameter as “50 mm”. Once, you added the dimension, the blue color of circle sketch turn to black color. That means, it is fully defined sketch.

Then, click on “exit the sketch” and go to Features command manager. Select “Extrude boss or base” tool from it.
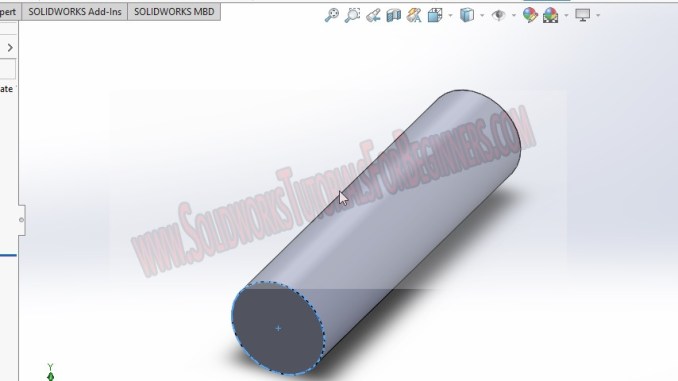
Select circle sketch and apply extrude boss or base tool. Enter the extrusion value to “200 mm” in extrude boss property manager for creating a solid 3D shaft.

Click on the green tick button to complete the 3d shaft.
Save as Part File
Go to the File menu and select “save” or select it from the quick toolbar at the top of the solidworks interface.

From the appearing dialogue box, choose the save destination in harddisk. Then, enter the file name as “solid shaft” / part-1 or anything you can identify it later. Save as type as “.sldprt”.

Insert Component to SolidWorks Assembly
For inserting components to SolidWorks assembly graphics area, you need to first open the assembly interface. For that, go to the file menu and open the “new”.

From the appearing dialogue box, select “assembly” and click “ok”.

Read Standard Mate Parallel Assembly Tutorial for beginners
It will open the assembly graphics area as shown below.

From the property manager, you can see “Begin Assembly” in the sidebar of SolidWorks assembly interface.

You can see the “Create layout” and “Browse” options. If you are using Top-down assembly method, you can create layouts, where you make components. If you are wish to follow bottom-up design, you can insert parts or machine components that created already.
Here, you are create solid shaft and saved. Now you have to insert to SolidWorks assembly graphics area.
Click on “browse” and select the created part file from the opening dialogue box and click “open”.


It will insert to graphics interface and you have to choose where to place it using mouse pointer.

Note for students: First component inserted into assembly area is fixed by default. So, always insert the stationary or base component at beginning.
How to Insert More Components
Go to the assembly command manager, and click on “Insert Components”. You can insert new components, new part, new assembly and copy with mates also.
Here, you have to use “insert components”.

Rest is same as the above. You have to browse the components and insert to SolidWorks assembly area.
This way you can insert design parts to assembly. If you like free SolidWorks assembly tutorial, feel free to share it other friends too.
Thank you friends.

SolidWorks Tutorials 2: How to Create Part Template in SolidWorks

SolidWorks Tutorials 15: Extrude Cut Feature
