Solidworks Tutorial 19: SolidWorks Swept Cut Features Tool
Hi Friends, Welcome to SolidWorks Tutorials for beginners training series and in this post, I am going explain the basic working of solidworks swept cut feature and its applications in design or product modeling field. In the previous post, you already see the SolidWorks Sweep boss or base tutorial with step by step images. Before going SolidWorks Swept cut tutorial, see swept cut feature basics and its application in product design field.
What is Solidworks Swept Cut Features Tool?
Solidworks swept cut is features tool, mainly used to cut a solid model or part by sweeping a completely closed profile along an open or closed path. To use swept cut, you should need a closed profile and open or closed path, which may be line, helix, and circle, rectangular or arc etc. The operation of this Features tool is similar to Swept Boss or Base, but only the difference is that latter removes material and foremost one ad up solid material to the body of design.
Checkout Best SolidWorks Training Materials here.
Swept cut features tool is very useful in creating 3D product design. The main applications are for making threads (both internal and external) on solid surface (bolts and nuts), making grooves on surface of body, Cutting holes, complex grooves or shapes etc.
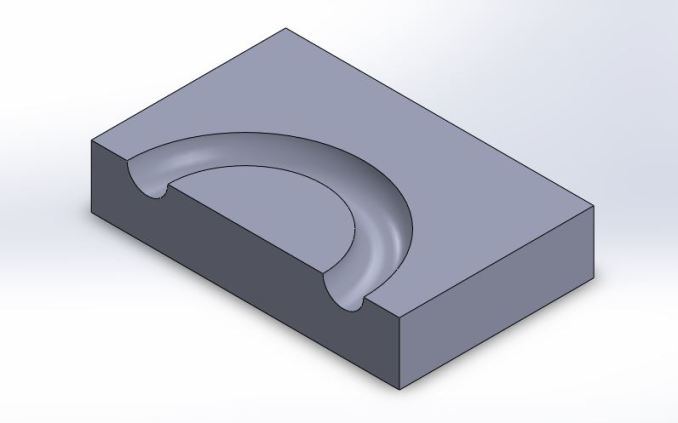
In this Solidworks tutorial, I am going to create solidworks part as shown in the figure.
Note: This is just tutorial showing how to use swept cut tool, not showing any product drawing or designing in it. If you are advanced SolidWorks user please avoid it. This Solidworks tutorial is for beginners, students or people likes to learn about SolidWorks.
Click here to Buy Advanced SolidWorks Tutorials from Amazon

Note: Dimensions are taken roughly for this tutorial.
Related SolidWorks Features Tools Tutorials:-
How to Use Solidworks Swept Cut
I think you understand about the Swept Cut features. Let us see how to use it in solidworks.
Step-1: Create New Part File
Open the Solid works and New part File. If you don’t know it, Read How to Create New Part File. Select the Plane (e.g. Top Plane) and normalize using the “Normal To” Button. Also Read SolidWorks Heads-up Toolbar on this blog.
Step-2: Use Rectangle Sketch
Here I am going to make 3D rectangular box and want to cut a groove on it to get as like the final image shown above.
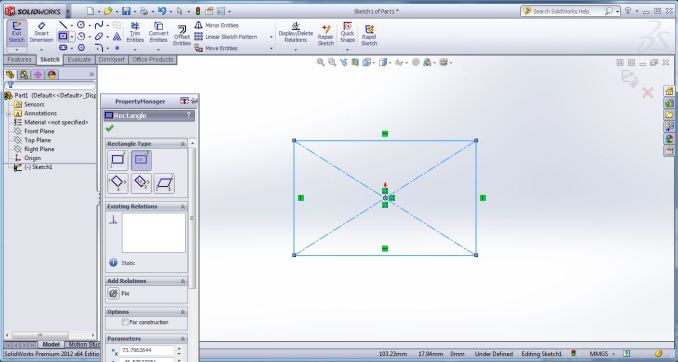
For that, move your mouse cursor to Sketch tools and click on the “Center rectangle” button. Draw a rough rectangle sketch on the normalized top plane. (No need to dimension and if you are associated with any mechanical project, must consider the dimensional part).

Step-3: Create 3D Rectangular Box
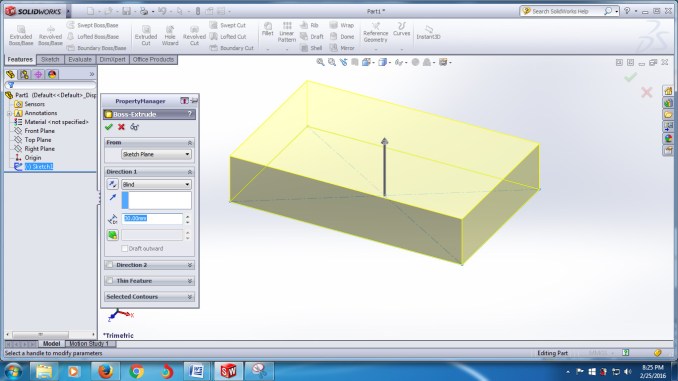
Now, you have rectangle sketch and click on the “Exit Sketch” button on sketch command manager. Select the “Sketch 1” from FeatureManager design tree. Then, go to Features Command manager and click on the “Extrude Boss/Base” button. The rectangle sketch preview is changed to box with yellow color. Set value “30.00 mm” in the Extrude boss or base property manager.

Click on the Green tick button.

Step-4: Apply Solidworks Swept Cut Features Tool
I want to create arc groove having semi circular cross section on the surface of the above showed rectangular box.

For that, select the top surface of the rectangular box, just by clicking on it. Then go to sketch tools, select “Center Arc” button and draw arc on the surface of the box as shown in the figure below.

Then click on the “Exit The Sketch” button and select “Sketch-4”. Go to Features command manager, and click on the “reference geometry” and click on “Plane” option. In the property manager, select the “First reference” as the full arc sketch as shown in the figure below.

Then select the any one of the end point of the arc as “Second reference” and the plane will become perpendicular to open arc profile, which is shown in the image below.

Click the Plane property manager green tick button to create the plane perpendicular to the open arc profile (Plane 2).
Then normalize the Plane 2 using “normal to” option and draw the full circle (closed profile) on the any one of the end of center arc.

Now we actually meet the Solidworks Swept cut tool requirements such as closed profile and open or closed path.
Then click again on the “Exit the Sketch” and select the “Sketch-5”.
Go to Features command manager and click on the “Swept Cut” features button from it.
Then a Swept Cut property manager will appear and in which you have to select the closed profile as “sketch-5”.

Path as “Sketch-4”, preview of swept cut is shown in the figure below.

Click on the green tick button and completed swept cut part is shown below.

Note for Readers: When you are going to use Solidworks Swept Cut or Swept boss/base features, you should make path (open or closed profile) and profile (that must be closed one), if you are doing Profile sweep. There is also “Solid sweep” is there, and you will see it in the upcoming tutorial posts.
Related SolidWorks Sketch Tools Tutorials:-
If you have any doubts in this swept cut tutorial, feel free to ask me and share your honest opinions about it via comment box or contact form. Thank you friends.
Related Posts

Solidworks Basics

SolidWorks Tutorial 12: Sketch Chamfer Tool

