SolidWorks Command Manager: Features Toolbars
The SolidWorks command manager contains the important or featured tools for making new designs. In the SolidWorks user interface, the command manger lies just below the Menubar and have 4 sub-sections (default). You can add more sub-sections by customizing the command interface. Here you are going to see the SolidWorks Features tool which helps a lot to make the designs in 3D. This tutorial only introduces the each tools the Features toolbar, represent it with their icon button and its functions also explained.
Checkout Best SolidWorks Training Materials here.
Note: Before using Features tools, you must complete the Sketch of the part.
Table of Contents
SolidWorks Command Manager Features Toolbar
The features toolbar contains very important and useful tools for 3D solid modeling. Let us see the functions of each of the features tools.
Related Post: How to Create New Part File Solidworks Interface
Extrude Boss/Base

The Extrude Boss/base is one of the most frequently used tools in SolidWorks, which enables to convert a 2D sketch into 3D model. It helps to add material to your sketch files. It is represented by icon
When you click on the Extrude button, the property manager opens which is shown below.
From this property manager you can add materials to your sketch drawing in one or two direction, make it thin feature or only for selected contours.
Revolve Boss/Base

The revolve feature enables to add materials to your 2D sketch by revolving a long as centerline or axis. The revolve boss/base is actually rotate the sketch along an axis. It helps to create parts shows the symmetry like cylinder, sphere, pulleys etc.
Swept Boss/Base

It is sweep feature which sweeps a closed profile through a open or closed path for making solid object. This feature helps to make solid part by guiding through a definite path.
Loft Boss/Base

It helps to create solid model between two profiles in a certain distance. It needs two or more profiles to add materials into it.
Boundary Boss/Base

It also helps to add materials between profiles in two directions to create solid object.
Note: above boss feature tools are add materials to create 3D solid objects using 2D closed or open sketch or profiles.
Extrude Cut

Unlike the extrude boss, the Extrude cut removes the material from 3D model by using a closed sketch (circle or rectangle etc). You can do the cut in one or two directions the using the property menu.
Revolved Cut

Using the Revolved Cut, you can remove the material by revolving a closed sketch around an axis.
Loft Cut

You can remove the materials between two profiles using the Loft Cut feature.
Swept Cut

It cuts the solid model by sweeping closed profiles through a curved path.
Boundary Cut

It also cut the material from the solid material between two profiles.
Hole Wizard

You can insert the per-defined hole in the solid body. This feature is very helpful to make fastener holes in the model.
Fillet

It creates round internal or external faces by using the edges of the solid model. You can control the radius of the fillet from the property manager.
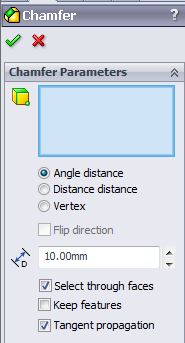
Chamfer

It helps to cut the edges to a certain angle and creates a flat face on the edges by removing some materials.
Mirror

If you want to create the mirror of a model, use the Mirror feature.
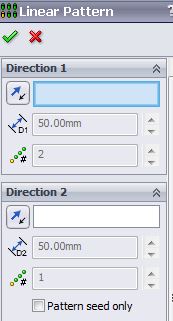
Linear Pattern Tool

If you want to create series of hole in the body of model in linear manner, use Linear Pattern.
Circular Pattern

To arrange holes in circular manner.
In pattern section, curve driven, sketch driven and table drive pattern feature are available. These features will see one by one in SolidWorks tutorials.
Rib

It adds this walled support to the solid body. You can also do it using the extrude boss, but for saving the time, Rib options the best.
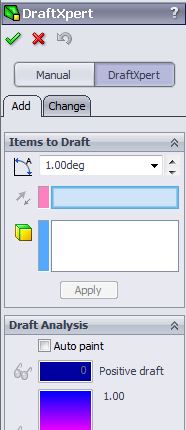
Draft

If you want to taper the face of solid body in particular angle about plane or parting line use the Draft feature.
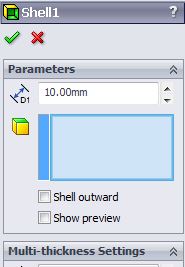
Shell

To create thin walled solid box, use the shell feature. Also read about SheetMetal Feature.
Wraps

It helps to create a closed contour on the face of a solid body.
Reference Geometry

It contains features such as Planes, Axis, Co-ordinate system, point and mate references.
Curves

It helps to make 3D curve line on the user-interface of the Solid works. It also contains options like Split line, Helix/Spiral, Project curve, Composite Curve, Curve through XYZ points and curve through reference points. Also Read How to Use Spline Sketch tool creating Curves.
Overall
These are the features tools which are contained in the Solidworks Command manager. These tools help to make solid 3D designs of various shapes or profiles. This article only explains the functions and introduces the main features property manager menus. I the upcoming tutorials, you will how to use the each one of the tools in very detail.
Thank you for reading and feel free to express the honest opinions about this post and my SolidWorks Tutorials blog.
Related Posts

SolidWorks Tutorials 2: Line Sketching Tool

How to Create Simple Hole_SolidWorks Tutorial 27


It is a good thing,you are doing
yep its nice to learn for beginers
sir i want to use rib command how work send all procces
hi abhi follow this link to see how to use rib feature tool in solidworks :http://shoutmetutorials.com/solidworks-rib-tool-tutorial/
thanks for your help.. add all the features.
thanks for your help.